
How to Install Pioneer Log Siding
Installs on most any flat surface as long as you can find the studs
Choose a Cabin Style.
Upscale Frontier Cabin Retreat.
Back in the pioneer days if you lived in the city you would most likely be considered more sophisticated, living a more fashionable life. Most likely your logs would all be the same size such as 12” wide. Your chinking spaces would be 2.5” to 4” inches wide, clean & uniform. Also in your planning you could use a blend of Pioneer log Siding, wood shingles, board n’ bat and river rock.
"Pioneer Woodsy Cabin".
Back then, woodsman living outside of town would most likely build their cabins using mixed log sizes & chinking spaces. With limited help, funds and winter approaching, they would rush to get dried in. They would cut most any trees they could get their hands on. These historic old cabins have a warming charm of their own to this very day.

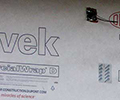
House Wrap. Make sure home is well protected with some sort
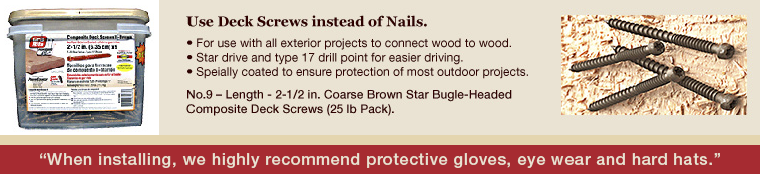
of plastic moisture wrap such as Tyvek. When installing House Corners, Trim or Pioneer Log Siding we suggest screw guns using mini headed deck screws sold at any Home Depot. This will secure your boards much better than a nail gun. The tiny holes are hard to see
and look a bit like wormholes.

Trim [&] Corners First. We always suggest that you install your House Corners; Window and Door trim first so that your siding can butt up against them and in between. Use a transparent or matching caulking around them. On the interior do the same but, for corners, rip your own 2x 2 vertical boards.


Siding Installation. We suggest starting your pioneer log siding at the bottom and working your way up. Decide on how wide you want your chinking spaces. Also you can stager your siding cuts as you wish. Your siding does not have to match up because remember, in the old pioneer days nothing was perfect. The last piece on your siding should be milled to fit snug up against the soffit.


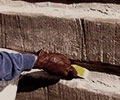
Spacer Strips saves you a bit on chinking. Use 1/2" thick particleboard in 8 lengths. Cut to any width you desire for your chinking spaces. Also the strips support your next siding run. Important: apply a typical packing tape over the strips before you chink to avoid it from sticking to them. The chinking should only stick to the top and bottom of your siding boards. Remember: the strips go on the houce before the tape.

Chinking Material. We suggest Perma Chink, The product is
flexible, strong and comes in several sandy tones. You can contact
( kathy@permachink.com ) or call 425-952-2016 and ask for Kathy. Shes helped many of our Pioneer customers. Request a free chinking information kit along with samples. Remember this! If you decide on white, it will upstage your siding and look like stripes from a distance.

Need Chinking for your project?
Nationwide we Suggest: Permachink
In California Visit: Cascade Chinking • In Montana Visit: Even-Flow Chinking